Evaluating and Reconfiguring
37 Hours Total Hours 63
I went through all the steps in the assembly instructions and studied the plans to make sure everything that had been completed on the plane, had been done right. This was tough to do but got easier the farther I got. Van does not have plans for a quick build kit so what I did was pretend it was a normal kit and look at each step and how the factory assembled it. (Note; A quick build kit comes with the majority of the wings and fuselage assembled.) All this took a lot of time but it helped me get familiar with the building process.The quality of the factory made parts were good. There were a few off the parts the previous builder had assembled that need redoing.
Bob had planned on replacing the two lower sheets, W-705, on the bottom of the wings. The previous builder had dinged up the metal in numerous places riveting on the skin and the rivets were less than satisfactory. Bob had ordered the new skins and began to drill out the rivets to remove the old ones.

Bob had given me on old vertical stabilizer that he had taken off another plane and I had spent considerable time practicing drilling out the old rivets on it. I learned to drill them out without damaging the holes on the part. EAA hints for home builders has a video showing this process. I found that the bit absolutely has to be centered on the rivet head. I would start drilling, then stop and look to see what direction I need to go to get more centered, then angle the bit and let it walk to the center.

When the hole is complete, a punch is inserted into the first part of the hole and the rivet breaks when you work the punch side to side. I got very good at this but I went thru several bits and punches drilling out the two lower skins. Removing the skins also gave me access to install my auto pilot servo, wiring, and everything else in the wing.

I then removed the nosedragger engine mount and built a temporary stand out of 2x6's with wheels on the bottom. This allowed me to roll my project around the shop. Then I blocked the fuse up and removed the landing gear.


I also decided to remove the top forward sheet F-7106 from the fuselage. I had to many badly driven rivets and I wanted the access to the sub panels so I could install the avionics and wiring. A new sheet is 75.00 from vans and I will install it later.

Then I wheeled my fuse around and drilled out and removed the F-712 bulkhead assembly.

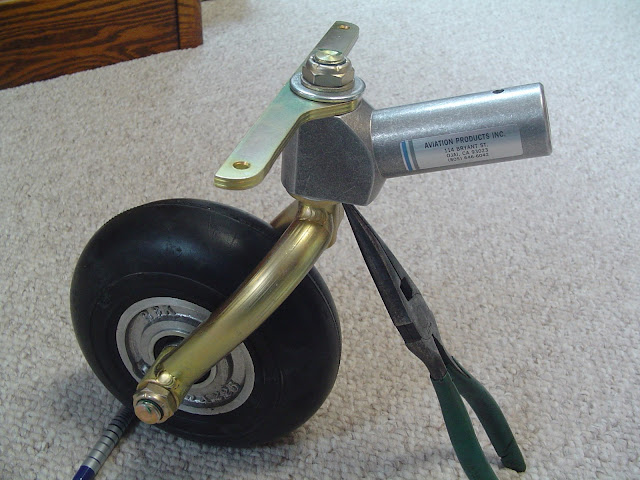
I then put the tail wheel weldment, tail spring, and two new F-712 bulkhead assemblies on the order list. After that I spent at least one full day researching tail wheels. I did not like Vans tailwheel. After reading tons of posts on VAF about different tailwheel assemblies, I ordered the 6" doublefork tailwheel assembly from Aviation Products Inc in Ojai, California. It had many good reviews and was actually cheaper than Vans.