Saturday, August 16, 2014

Baffle Seals, Oshkosh, Cowl and Spinner

Hours 59
Total Hours 1144

My two weeks off this time consisted of two days work on plane, then 5 days Oskosh Air Venture trip, two days work on plane, 4 days family lake trip, then two days work on plane. I have been getting up to work on the plane at 3:00 am then quitting at noon because August in Texas makes working in the hanger without an air conditioner very uncomfortable in the afternoon.  Before we left for Oshkosh, I worked on my oil cooler mounting and got everything finished except for mounting because I need to order the right length bolts. I will also build a brace from stainless  tubing as the baffles are bad about cracking without additional support.


The baffles are mostly complete now.


Next I started cutting paper patterns for the baffle seals. The baffle seal material Vans give you in the kit is just enough to do the job so I used the patterns. The plans call for 2" of material above the baffle and 1" below the baffle. This is a selfie  pic as I am not in many of my pictures.

More patterns.


I'm not sure how the baffles seal in the front and around the crankshaft so I left plenty of materiel in these areas. I plan to solve this mystery looking at planes at Oshkosh.


This shows the gap between the cowl and the edge of the air intake area of the baffles. A gap is necessary because the engine will be shaking while the cowl will be stationary. 


The plans show a conical aluminum piece rounding out this corner but if I put one in, it will black part of my air filter. I'll contemplate this for a while along with sealing all this area off.


Trip to Oshkosh and Airventure 2014
 I had planned the trip to Oshkosh in February and had it all set up and was excited as hell about it. I was finally going to see multiple RV7's and get to talk to some other builders. We got up at 4 am and made it to the airport for a 7 am departure and just before the plane pulled out of the gate the pilot announced that they had found a hydraulic leak on the plane. We de-boarded and after waiting till 3:00 PM, SWA cancelled the flight altogether! It was a dagger thru my heart! Our only choice was to book the same flight the next day. 
I was really upset because three days at Airventure is not enough, now we were cut down to two. Nancy and I finally arrived at Airventure 2014 on a Friday evening. The time it took us to travel to Oshkosh by commercial airlines wound up being about 34 hrs! I believe I can beat this by at least 24 hrs flying my RV7 next year!........Well all that aside, we had a wonderful time! I still got to see many RV6's and 7's and visited with several pilot/builders and made lots of new friends. The folks we rented the room from gave us a great taste of hospitality Wisconsin style and they were wonderful! We looked at a lot of paint jobs and I stuck my nose in several horizontal induction RV's to look at the baffle seals. I also took a lot of pictures of these. The one thing that really made an impression on me was, none of the planes were perfect! Most had very small flaws like cracked paint over rivets or a scratch here or there but it made me relax a little about some of my little cosmetic flaws. The EAA people that put this show on were really friendly. They did everything possible to help us get all we could out of our short time. My phone app said we walked over 8 miles on Saturday! It was everything I expected X 2. My first trip to Airventure was a huge success. My advice to anyone that has not been is go before you start building, do not wait till you are almost finished as I did. Well, I do have a good "lay of the land" now, and I feel comfortable flying in next year!

My bride of 33 years standing beside another beautiful creation at Airventure! I am so lucky to have a girl that supports me and my crazy adventures. She can buck rivets too! I think I have her talked into camping on the ground in a tent for several days next year after flying 1,100 miles in our home made airplane!


Great trip but I couldn't wait to get back at home and dive in to the baffle seals! I had previously decided to paint the baffles but after looking at all the planes at Airventure, not one of them had the cowl off so I may just paint the intake ramps as that is all that will show.Vans demo RV7 had unpainted scratched up intake ramps so I'm not going to spend the time.


I needed to seal the ends on the fiberglass dams on the cowl so the seals would seal well against them. I didnt take a picture but I glassed over this foam block that I carved and shaped from some stereo-foam I had laying around.


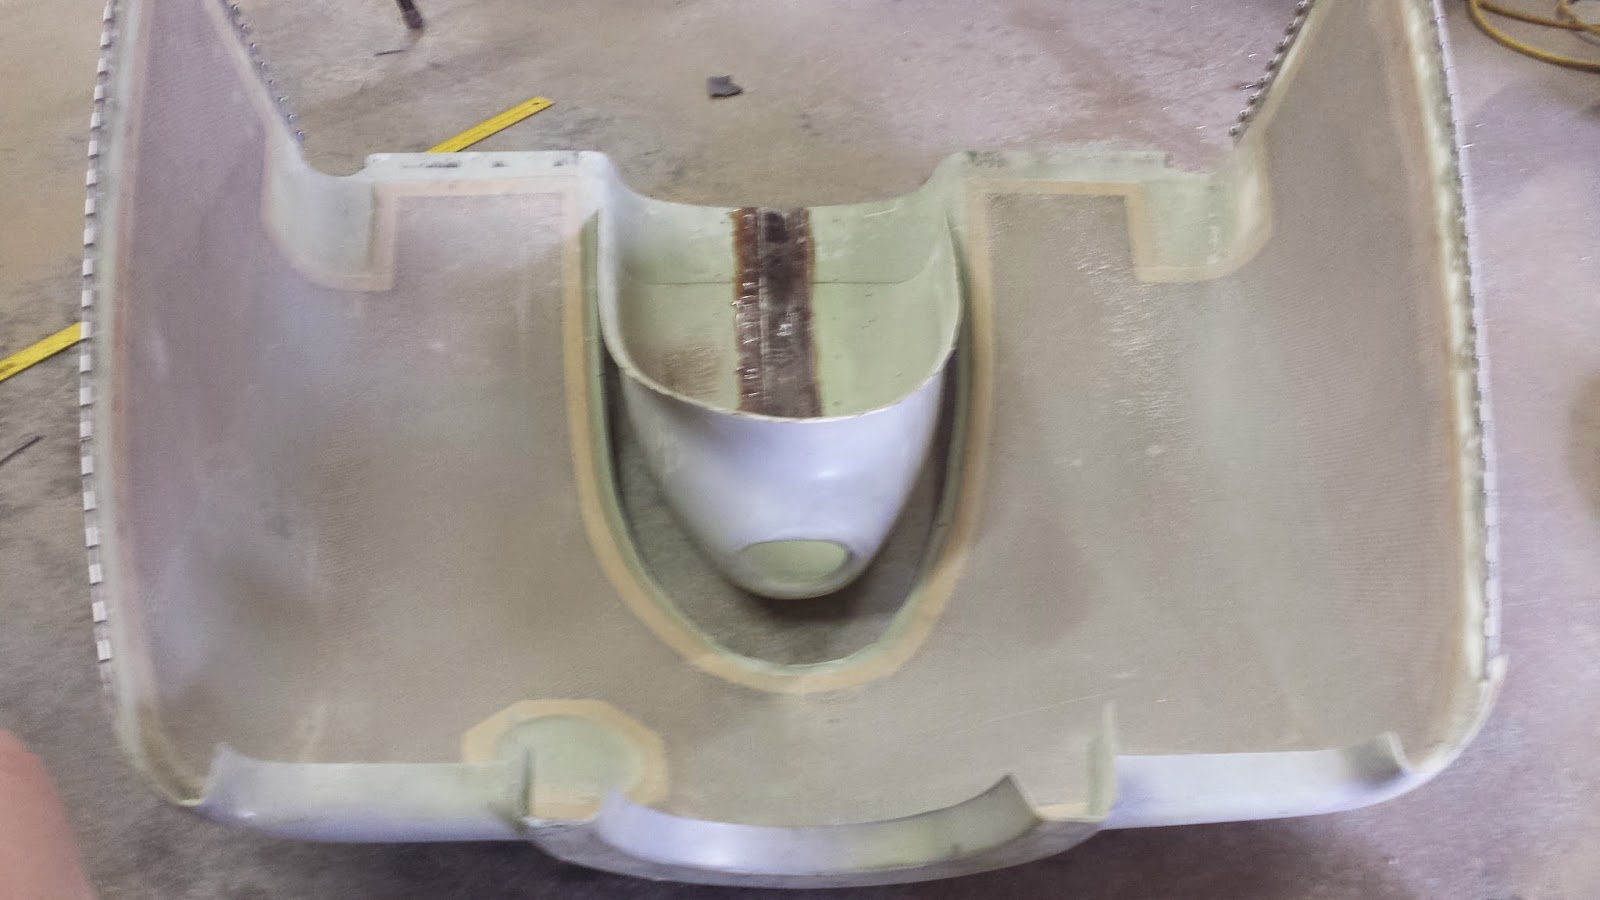
  One thing I noticed at Airventure was that all the horizontal induction RV's did not have the traditional Vans "Snout". I bought this project and never gave it much thought that it came with a vertical intake cowl with the snout. Vans sells a horizontal intake cowl that is smooth. The snout on a horizontal cowl really has no purpose and even though I had grown to like the looks of the snout, it bothered me that it would always be there, possibly causing additional drag (never been proved). I would also need to plug it as it being open would prevent the lower half of the cowl from being lower pressure than the upper half of the cowl. This would hamper the engine cooling ability. When I started this project, I decided what I wanted was a very clean look. Thats why I installed hinges to mount the cowl. I also plan to install hinges to mount the wing tips. I fought with myself for several days but finally decided to do some surgery on the cowl and amputate the snout! This is what everyone warns everyone about with building an airplane! Modification cost time. This will cost me a lot of time for sure............

I studied the snout and decided to cut it here. Notice the strip in the middle that the previous builder had cut for a nose gear?
I cut the snout out.


Then I cut the upper part of of the snout off the bottom piece and studied on how I could use the old piece to keep me from using up all my fiberglass cloth and building a mold.


Here is what I need to clear with the bump.


I would up forming a makeshift mold out of the old piece and packaging tape.  


I then glassed the inside with two layers of heavy 2" fiberglass cloth tape.


When that set up, I mixed micro balloons with  just a dab of flox and built up around the bottom to smooth it out.


Unfortunately, the heat muffler still needed more clearance. I cut out the hole to add a "blister" 


I glassed in the blister. Now the job at hand is smoothing everything out and making both sides match. I am doing this with batches of micro with just enough flox mixed in it to hold it in place. Add a little here, let it set up, and sand it while its green, then do it all over again. If I had to do this over, I would have made a mold out of something the first time so that the muffler would clear. This modification is costing time and materials but the last thing I need is the cowl to get burned spots ruining my paint job later down the line!


While working on the cowl reconstruction, I started another time consuming project! I want a screwless spinner to contribute to my "clean look"! Here is a look at a picture of one. I found it on the internet. It is so clean and slick without any screws showing! I have been studying this mod for a long time and I want it! All it will cost is TIME! I will keep a close watch on it to make sure it is secure after each flight but several builders have been mounting this way successfully.


First I needed to sand the proper prop openings in the spinner and the fillets that go on the back of the prop. To do that, I needed to see how much the constant speed prop adjusted when oil pressure hit it. I had read about hooking up an airline to the prop hub. I took a 1 1/2" pvc fitting and it fit perfect inside the prop hub. Hooked up to a regulator set at 35 psi, I could hold the greased fitting in the hub and watch the blades adjust all the way out. I trimmed the filet to give the prop plenty of opening. This is my PVC fitting.


I wrapped the rear spinner bulkhead with packaging tape and the waxed it several times. I cleckoed the spinner to the bulkhead and laid up a flox/epoxy filet in the corner. You can see the fillet just inside the spinner. This will help the fiberglass make the curve and give the flange more strength.  


 After the fillet set up I laid up 6 layers of 8" bid cloth then topped it of with a layer of the heavy 2" fiberglass cloth tape and let it cure.


I was a little worried about getting the flange to pop loose of the bulkhead but after a little prying with a screwdriver, it came apart.


Then I trimmed up the flange and installed #8 nut plates. 


This made a very strong flange. Now the screws will attach the bulkhead from the rear of the bulkhead and not be visible.  I will proseal the front flange to the spinner with mold release on the spinner to create a tight fit on the front and prevent any wobble. This turned out nice and I'm pleased with the new skills I have acquired working with fiberglass!

 Thats all I accomplished in this go around and its back to work tomorrow for a 3 week hitch. I have a lot more shaping to do on the cowl and still some baffle seal work to do. It seams I have 20 different projects going at once with the plane and I cant seem to finish any of them! Hopefully I can make some real progress in September. I would like to be painting before the first of next year, but whatever it takes, it takes.


Tuesday, July 22, 2014

Baffles

Hours 102
Total Hours 1085

One of my biggest problems and what I have learned to deal with somewhat is multi-tasking. I have always liked to finish one thing before starting another but that cant be done with this airplane. I need to finish the baffles before I can finish wiring the engine. Cowl before the baffles. Spinner before the cowl, and so on. The engine wiring, baffles, and cowl all have to be completed together. This means I have parts scattered all over the hangar waiting for their turn to be installed. I have ordered certain length bolts and various hardware, and by the time they come in, I have a hard time remembering what they were for because I have moved on to the next part of the build! I hope to be clearing some of this up in the coming months. I have been reading a lot and planning my attack on the Baffles, so I began by cutting out the new spinner  for the prop which needs to be removed for easier access to the baffle work ahead.

Then I rigged up a pencil on a stick to check and make sure the spinner was even and not wobbling when spinning. I pulled the top plugs and hit the starter and watched the pencil marks. I drilled the holes thru the spinner and rear bulkhead after getting it good and straight.  Later I plan to mount this spinner without any screws showing. It is a modification I have read about on VAF.

I then unmounted the prop and began the baffles. I had been studying this operation for several weeks so I felt fairly confident. Since the Lycoming IO-360 is an air cooled engine, and the RV7 is a tight cowled design, forced cool air needs to be passing by the cooling fins of the engine while it is operating. Air enters the two holes in the cowl on either sides of the prop into the top area that is separated  from the bottom area inside the cowl by the baffles. This creates a high pressure side on top of the cylinders and a lower pressure side on the bottom of the cylinders. This causes forced cool air to pass in between the cylinders and thru the cylinder cooling fins and exits out the bottom cowl. This, hopefully, keeps the engine operating temperatures in the green. I fitted all the baffles and skipped the oil cooler install for now. Before I knew it I was needing to configure the "snorkle" for the airbox filter and horizontal induction into the left intake ramp.


This is the "snorkle" kit from Vans.


 I found that a 2" PVC collar would fit into the fuel servo after grinding the edges off slightly. Then I wrapped it with duct tape to center the snorkle when it is mated with the servo. 


 I need the fiberglass snorkle to come up from the servo to the left inlet ramp and then form a housing for the air filter. This takes a lot of thinking. Since there are so many different engine combinations for these planes, Vans has generic instructions and you have to figure out what is best for your situation. I put the bottom cowl on to trim the front of the air ramps.


I made a template from copy paper by holding it up against the servo and tapping it with a rubber hammer to create a out line for the holes needed in the snorkle.


 I then drilled the holes and cut the snorkle to shape.


Here is the snorkle fitted to the servo and ramp.


I cut out the ramp.

 Unfortunately, I realized the filter would be located farther to the outboard side of the engine than what I would like. I researched the matter and found out that the snorkle is designed to go on the IO-360 angle valve engine which is a little wider than my IO-360 parallel valve engine. The only way I can get the filter over where I want it is to cut part of the snorkle and shorten it then re glass it all back together. I decided to take the route several other builders before me did and just leave it where it is. It will not effect the performance at all, I just had it in my mind that when I looked through the inlet hole, I would see the whole filter sitting there right in the center. It bothers me but I will get over it.


This is my bending brake. I am forming a plate to go over the air filter to secure it in place.


Here is the plate installed over the filter. The bend is on the outboard side and it will screw into the #2 baffle. I dimpled all the holes and installed nut plates into the filter box built out of angle. The angle was then riveted to the fiberglass snorkle. It is built so you can remove the filter without removing the cowl but after installing the top cowl I realize you may have to be a contortionist to accomplish getting the screws out!


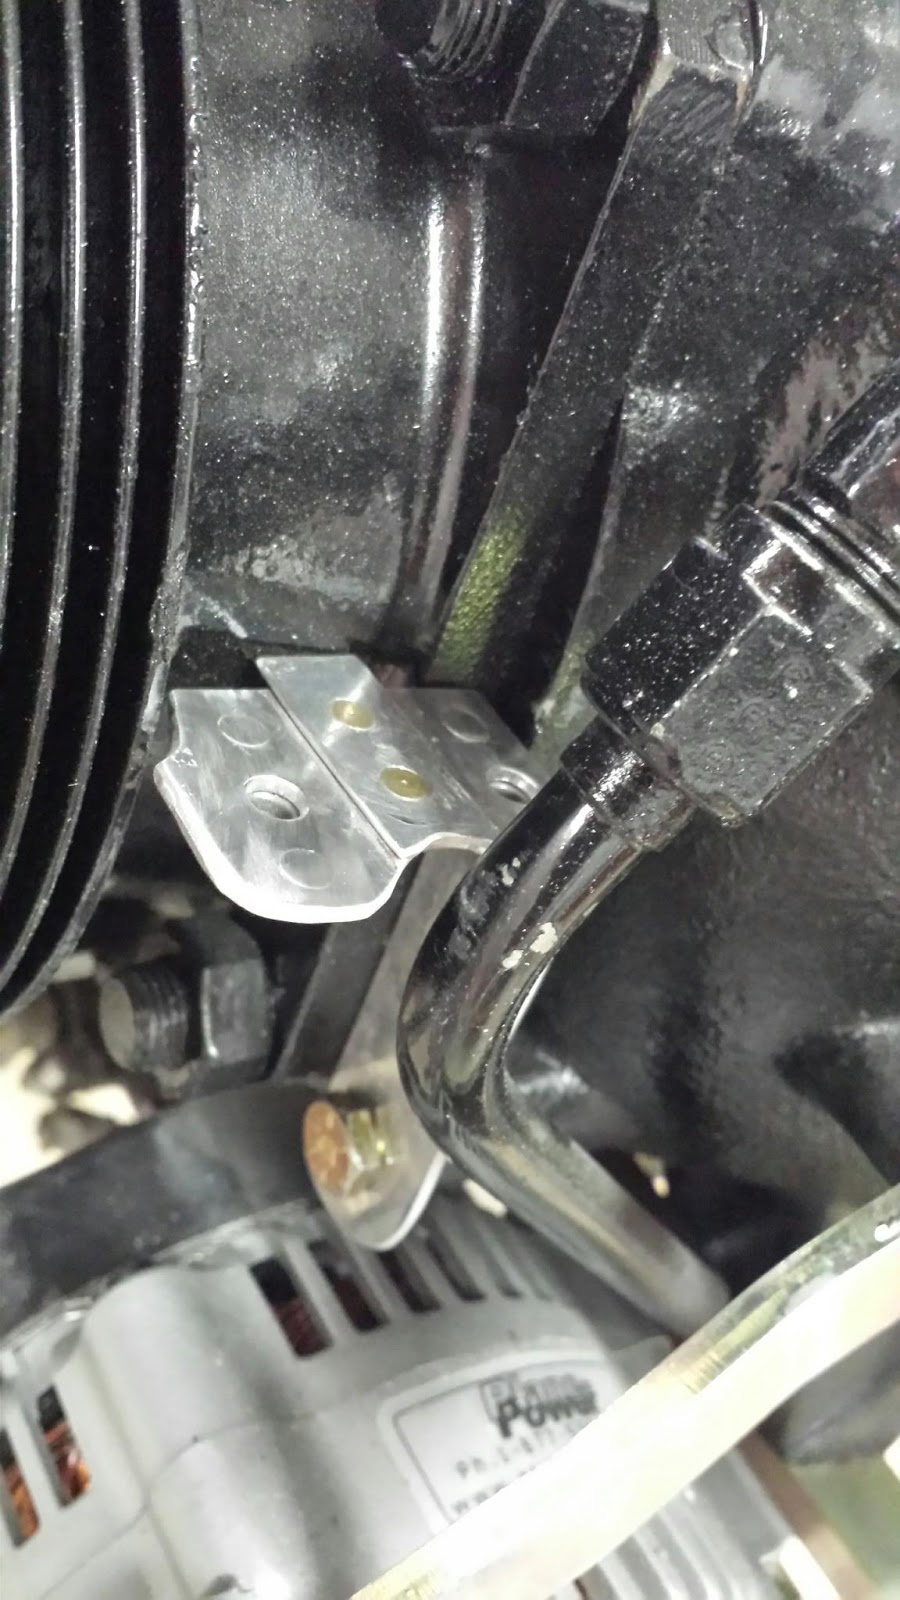
 I thought I would get by without doing any surgery on the snorkle but the alternator bracket was almost touching the snorkle so I cut out a portion of the snorkle to clear the bracket.


Unfortunately I found out what a dremel tool with a multi purpose cutting bit can do when it gets away from you! I spent 15 minutes of my precious time cleaning up DNA all over the workshop. At least I will not have to worry about this fingernail getting too long any time soon!


After I stopped the bleeding, I glassed over the hole with 4 layers of 8oz cloth. Then I sanded it smooth later.


sd

  I then installed the alternate air door as per Vans plans. I mixed up a batch of flox and blended the opening to the rest of the snorkle. The alternate air door is opened from a control cable in the cockpit in the case of ice or snow blocking the air filter.


I worked on modifying the point where the right air ramp mounts to the engine block. The plans called for taking the constant speed prop oil line loose and fitted thru a hole in the ramp. I cut a slot in the ramp so the fitting would not need to be taken loose every time the baffles are removed. A rubber grommet goes around the pipe at final assembly.


I built the air dam gusset to go onto the right ramp and riveted it in with flush rivets.
Added angle supports


Filter housing installed.

I used two 2x4's to space out the cowl. I cut an aluminum spacer and drilled a hole allowing for the width of the boards plus 1/2" with a hole drilled in it. I inserted a fine point magic marker in the hole then reached inand marked the baffles all around. The goal is to have a 1/4" gap between the top of the baffles and the cowl. 


After confirming I had trimmed just enough to get the top cowl on, I did the paper clip trick I had read about. I put paper clips all around the baffles then lowered the cowl on. The top cowl pushed down the paper clips to the point where I could measure the gap I had. I then added what I needed for a total of 1/2" of gap.

I then went to work on the oil cooler installation. I mounted it as high as possible so the #4 cylinder would block less air to it.

I had to quit at this point and get ready to go back to work. I put in 85 hr building the baffles and still need to add the baffling to the top to seal them. Then I will probably paint them as it looks like I drug them behind my pickup for a hundred miles! I started my mornings at 3AM and worked till noon this month to avoid the July heat in the hangar. There was a 4 day lake trip included in the two weeks I was off but to be honest, I needed that break. I didn't get as much done as I would have liked but I got some pretty big boogers behind me. I will now work a week and then go to Oshkosh for my first trip to Air-venture! I hope to meet and talk to other RV builders there and meet some of the people (venders) I have been supporting these past two years. I also hope to make a decision on the paint that I will use after seeing all the home builts there. I'm EXCITED about that trip!

Wednesday, July 2, 2014

Cowl Work

Hours 56
Total Hours 983

Well, not much to tell on this post. I had a lot of farming to do on my days off and my nephew got married so not much time left for working on the plane. I did not take a lot of pictures this time as I was in a rush to get something done.

 First, I lined up the cowl to be even with the spinner using the aluminum angle pieces. Made sure the front openings for the air scoop was level. This takes a lot of "eyeballing"! It can drive a person crazy as there is no way to measure to make sure you are level.Then placed a light bulb inside the cowl and drilled the cowl for the hinge.


I installed the hinges on the upper cowl after sanding the edges as close as I could. I used the method described in the plans using epoxy flox mixture to glue the hinges down and riveted it up. Much to my dismay, the 1/16th gap in the lower part of this picture looks a little wide. Its a good thing I have learned how to "scarf" the fiberglass edges. You can see in the upper part of this photo where I added or "scarfed" about 1/4" on the end of the cowl edge. I also had to repair the holes left by the previous builder for skybolts. You can learn all you want about "scarfing" on VAF forums like I did. I also made the two upper hinge pins out of .125 stainless steel pins although the plans called for .90 pins. I chucked the pins in my drill and polished the pins down to about .90 on the last 8 inches where it takes a curve down. This allowed me to use the larger pins and prevent any slop in the upper area as other builders have reported with the .90 pins. I was worried about the pins being tight and hard to remove reaching thru the oil door but after working on them for some time, I had them sliding in surprisingly easy.


I fitted the lower cowl to the upper cowl and installed the vertical hinges. These hinge pins do not need to be polished down as the are not curved. I then "scarfed" about 1/2" of new fiberglass on the upper edge of the lower cowl where the upper and lower cowls meet horizontally. The previous builder had presumably planned on using skybolts so there was an unacceptable gap and all the holes for the skybolts had to be filled. I will need to sand a 1/16" gap between the cowl and forward fuselage to allow for paint but I'm going to do it very carefully as I am getting tired of scarfing new material on the cowl.


I installed the horizontal hinges and fashioned the pins. I polished them up with emery cloth and lubricated them and after some work, had them sliding in easily. I applied painters tape all the way around the cowl as a sanding guide for the 1/16" gap for paint. I then sanded the gap with a straight 1x3 board with 80 grit glued onto it. I then did the same for the upper cowl and where the cowls join. I have a lot of work to do on this cowl but I am very happy to find out anything can be fixed on fiberglass! There was a time early on when I thought I would have to buy a new cowl because of it being fitted and cut on by the previous builder..........Hopefully, on my next days off, I can attack the engine baffles installation and work a little more on the cowl.